My 3 Favorite Moves For a Strong Pregnancy

By: Dr. Stephanie Duffey • May 19, 2020
Friends, we’ve entered the third trimester and now, more than ever it’s important for me to support the growth of my little man through exercise. I thought it’d be fun to share my 3 favorite moves for a strong pregnancy for all the mama’s to be out there. But first a note about an old school myth that I’d like to crack…
 
There used to be a common misconception that exercising during pregnancy could be detrimental. Today, research points to the importance of physical activity for expectant mothers. Not only is it important for your baby’s growth, but it can alleviate some common discomforts of pregnancy and even help prepare your body for labor and delivery.
 
The key to a beneficial prenatal fitness routine is strength training. The hormones your body produces throughout your pregnancy can cause ligaments to expand and relax so to maintain strong muscles, stability and strength exercises are important. Plus, you need a strong pelvis to support your growing little one.
 
*Before you start an exercise program, be sure to check with your health care provider.

1. Bird Dog
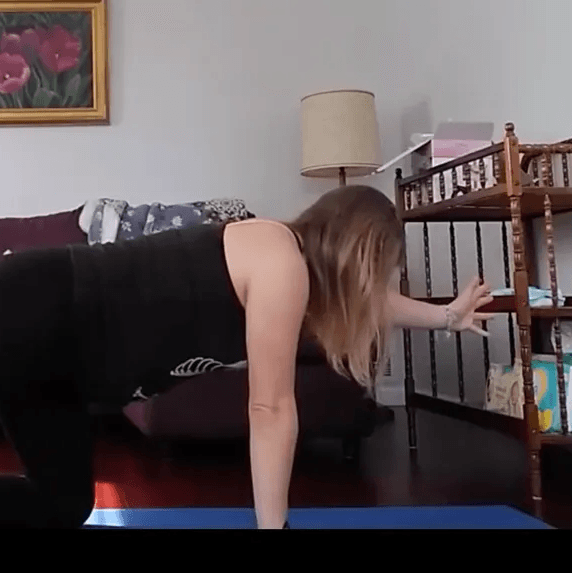
Position yourself on your hands and knees with wrists under shoulders and knees under hips. Make sure your back is straight, not arched or sunken down. Engage your core and pelvic floor (aka perform a Kegel), then straighten out an arm and the opposite leg. Be sure to keep your low back and pelvis in neutral, don’t rotate! Return to starting position and alternate sides.
 
*Expert tip #1: You can check to make sure your back is straight by having someone place a yardstick along your spine. You should have contact with your back to the yardstick from the pelvis up to the mid back.
 
*Expert tip #2: You can place a 2 pound dumbbell parallel to your spine. Keep this dumbbell in place and don’t let it roll off your back when performing the exercise. That way you know you have excellent control!
Bird Dog — Westerville, OH — Empower Physio & Wellness
​2. Hip Abduction Leg Lift
Lay on your side. Your hips should be slightly rolled forward and your top leg should be extended slightly behind you. Bend the bottom leg for support. Raise the top leg up in the air while keeping toes pointed forward or slightly downward. Lower and repeat. 
 
*Expert tip: Make sure your hips don’t roll back and that your top leg doesn’t come forward with toes pointed to the ceiling. This is your body cheating and using the front hip muscles (aka hip flexors) instead of the hip muscles (aka gluteus medius)!
Hip Abduction Leg Lift — Westerville, OH — Empower Physio & Wellness
3. Squat
Stand with feel hip width apart. Engage your core and pelvic floor (aka perform a Kegel). With weight driven through the heels, squat down as if you are going to sit down in a chair. Your knees should stay in line with your toes, make sure they don’t fall inward towards each other. Return to standing and repeat.
 
*Expert tip: Keeping your weight in your heels engages the oh-so-important glute muscles!
Squat — Westerville, OH — Empower Physio & Wellness
Please remember that none of these exercises should be painful or cause any type of heaviness or discomfort in the pelvis! If they do, please stop immediately and contact a physical therapist or healthcare provider.
 
​Questions or comments? I’d love to chat with you!

Bottom’s Up! How Much Water You Actually Need To Be Drinking

Dr. Stephanie Duffey • Jun 15, 2020

water 27692be0 960w
With summer upon us and the outside temp heating up, I thought I’d pop in with this blog post all about drinking water! Do keep in mind that it’s important to stay hydrated all year long (not just during the warmer summer months). Here, I’ll break down everything you need to know—from the important role water plays in keeping you healthy, to tips for meeting your daily intake needs.
 
What’s the deal with water anyways?
 
As crazy as it sounds, did you know that up to 60% of the adult human body is made up of water!? Check out this break down of the water percentages in your body:
  • Brain and heart = 73% water
  • Lungs = 83% water
  • Skin = 64% water
  • Muscles and kidneys = 79% water
  • Bones = 31% water
 
So why does all this matter? 
 
Water not only helps your body stay hydrated, but it also keeps your muscles and joints lubricated for maximum efficiency. Water is beneficial to other systems too because it:
  • Regulates our internal body temperature by sweating and respiration
  • Helps transport oxygen all over the body for a healthy heart
  • Assists in flushing waste and preventing constipation
  • Acts as a shock absorber for the brain and spinal cord
  • Forms saliva and aids in digestion
 
How much water should I actually be drinking?
 
Now, to answer the question you’ve all been waiting for! How much water should you be consuming on a daily basis? The amount varies per person but the easiest way to think about it is to aim for half your weight in ounces of water.
 
So let’s say you weigh 150lbs. Your water intake should be right around 75oz. Another factor to pay attention to is activity level. If you exercise often and sweat a lot, you’ll want to consume even more water to replenish yourself. You can perform a sweat test before and after exercise to see how much you’ve lost through perspiration. For every pound you lose, that’s an extra pint of water you need to drink.
 
Tips for getting your H20:
  • Sip your water throughout the day rather than chugging it all at once and always keep a bottle with you (Hint: If you’re thirsty you’re already dehydrated).
  • Use water as your main source of hydration (Drinks that are high in sugar or caffeine can actually dehydrate you).
  • Check the color of your urine (It should be pale and clear rather than dark and odorous).
  • Try infusing fruit into your water for a fun and refreshing flavor.
  • Incorporate liquid-based fruits like grapes and watermelon into your diet (these provide hydration too!)
 
​I hope you found this post to be helpful. Questions or comments? I’d love to chat with you!

8 Tips For Tight Hamstrings

Stephanie Duffey • Jul 06, 2020

matthew lejune JMH6m6BKL6U unsplash 960w
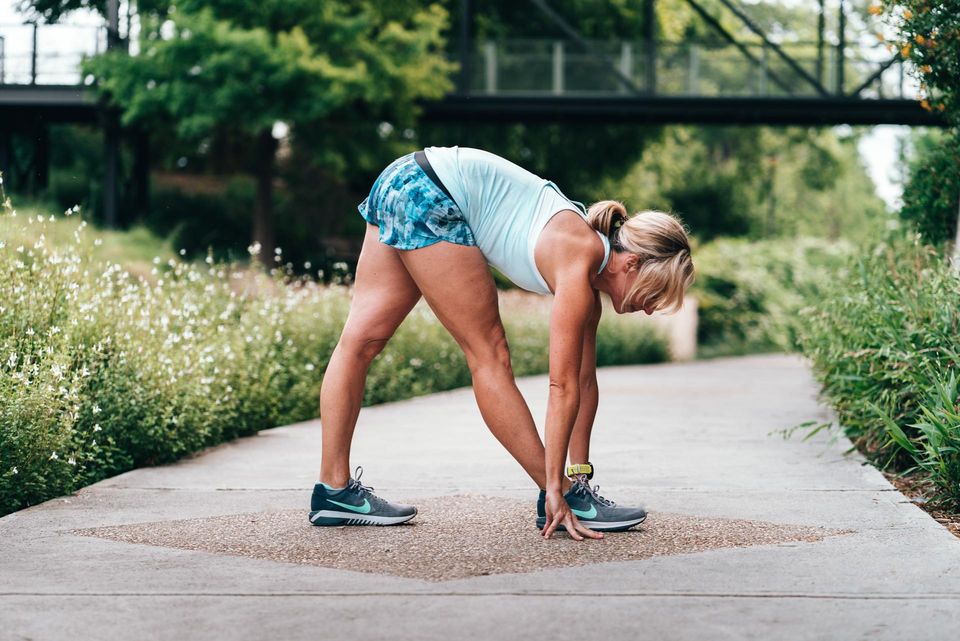
As a physical therapist, I hear complaints all the time related to tight hamstrings. In fact, the hamstrings get a bad rap for always being the problem muscle, but if we take a closer look, you’ll find that your hamstring tightness may just be a symptom of another issue. Here, I’ll break down my top 8 tips for relieving tight hamstrings and preventing future pain in this muscle group.
 
1. Don’t be a sloucher. 
Poor posture can be a huge contributing factor for hamstring tightness. When you arch your back, you’re actually putting more strain on your hamstrings to help hold you in that position. Instead, focus on stacking your ribs over your pelvis. Your hamstrings will thank you!
 
2. Be a belly breather.
Being a belly breather goes hand in hand with keeping good posture. When you stand properly, your diaphragm works more effectively, enabling you to breathe better while creating stability and activation through the core. 
 
3. Keep your core strong.
When you stay mindful of your posture and breathe through your belly, you’re activating your core. In addition to following tips 1 and 2, it’s also important to specifically target the core as a muscle group. Tight hamstrings could be compensating for a weak core, so make core part of your weekly training routine. Here are some of my favorite exercises to work those abs (Plus bonus side effect: You’ll look great in your swimsuit!)
 
4. Keep your glutes strong.
Remember in tip 3 when I said that your hamstrings could be compensating for a weak core? The same is true with your glutes. The more you train the glutes and core, the better off your hamstrings will be. So share the love with other muscles groups. Download my Runner’s Prehab Guide for some of my favorite moves for strong glutes. (These are great exercises even if you don’t run!)
 
5. Don’t be a “sitter.”
This one’s for all my peeps with desk jobs. When you sit all day, you put your hamstrings in a shorter, tightened position. Take advantage of this quarantine and break up your day by going for short walks so you don’t get stiff. It’s also a great way to take a mental break!
 
6. Remember the hammies in your strength routine.
Fun fact, tight muscles do NOT always equal strong muscles. If your hamstrings are tight, it could actually be a sign that you need to strengthen them. Try some of these moves for strong hamstrings.
 
7. Practice dynamic stretching before a workout
You’ve probably heard this before but it’s incredibly important to move while you stretch to prevent cramping and better protect your muscles. Try walking hips swings or some of these exercises to set yourself up for success before your workout.
 
8. Foam roll after a workout.
One of the best ways to release knots and trigger points is foam rolling. It’s an awesome recovery for your muscles after a run or workout and provides a deep release while preventing muscle tension and pain. Do your muscles a favor and show them some love after you make them work! Here’s my favorite foam roller.
 
Need help treating your tight hamstrings? Let’s chat!

Self-Care is Important: Here’s Why You Should Make It Part of Your Routine

By: Dr. Stephanie Duffey • Feb 10, 2020


A Girl Taking Yoga — Westerville, OH — Empower Physio & Wellness
Have you ever heard the expression, “You can’t pour from an empty cup?” When I was taking a yoga class the other day, the teacher mentioned this when we were holding a stretching posture for a particularly long time. While I was uncomfortable, her words really resonated with me.
 
All-too-often, we don’t take the time to slow down and take care of ourselves. This is especially true when it comes to our fitness routines. A lot of people focus on the hard stuff, but the recovery time is equally important because that’s when your muscles rebuild from the intense workouts. There are actual chemical changes that happen in your body to help rebuild your muscles and if you skip out on slowing down, you’re not getting the maximum benefit from your workouts. Proper self-care reduces your risk of injury, helps you feel healthy and strong, and is great for overall mental health.
 
My key tip for showing yourself some love is to focus on recovery. This means getting enough sleep, fueling your body with nutritious food, staying hydrated, and incorporating stretching into the mix.
 
Remember, workouts don’t always have to be so intense, they can be enjoyable too. Listen to your body and if you aren’t feeling it, slow down and recognize that the recovery time will be better for you in the long run.
 
If you need a little inspiration, here are a few of my favorite ways to practice self-care:
  • Foam rolling
  • Slow yoga (yin and deep stretch)
  • Going on a walk
  • Writing in my gratitude journal
  • Going to bed early
  • Enjoying a massage 
  • Knitting and watching Say Yes to the Dress (guilty pleasures!!)
I hope this encourages you to find a productive way to slow down and nurture your body. Need help developing a self-care plan? Let’s chat!

Need New Running Shoes? Read This Post About Pronation First

By: Dr. Stephanie Duffey • Feb 17, 2020

Wearing a Running Shoes — Westerville, OH — Empower Physio & Wellness
If you’re a serious runner, you probably go through shoes pretty quickly (I know I do!) Or if it’s been a while since you’ve replaced your shoes (over 300-500 miles) it’s probably time to consider a new pair. But before you do, READ THIS POST! I’ll share my tips for identifying the right type of shoe for you based on the level of pronation in your feet.

WHAT IS PRONATION?

Let me start by saying, pronation is NOT a bad thing–it’s normal and it occurs when your foot absorbs shock as it makes contact with a surface. Pronation is essentially the natural process your arch follows from a lifted position, to a flattened position when you’re walking or running. When selecting the proper running shoe, you’ll want to pay close attention to your gait, which can show a pattern of neutral pronation, over-pronation, or supination (under-pronation).

OVER-PRONATION

Causes: Excessive, or over-pronation is when you pronate too much, too quickly, or stay in pronation for too long. This could happen naturally if you have flatter feet.
 
Symptoms: You could be experiencing tendinitis, shin splints, runner’s knee, or plantar fasciitis.
Shoe Recommendations: You’ll need a pronation control or stability shoe. The inner part of the shoe should have a thicker material to support you. You may consider brands like Brooks and 361. You can also try an insert for additional support (I like Powersteps), however don’t just jump to inserts right away. When your running or walking shoe is properly selected, it should give you enough support. 

UNDER-PRONATION

​Causes: Under-pronation, or supination occurs when you have a more rigid foot that isn’t absorbing shock as well as it could be. This could happen naturally if you have a higher arch.
 
Symptoms: You may be experiencing general joint aches and pains.
 
Shoe Recommendations: You’ll need a nice, cushiony shoe that’s shock-absorbent. You could explore New Balance, Hoka, and Mizuno shoe brands.

OTHER TIPS

No matter what level of pronation you have, I recommend going to a shoe store where they watch you walk or run on a treadmill to see how your foot looks and feels in a shoe. Make sure you’re comfortable. When you find a shoe that you like, stick with it, but I’ll caution you to pay attention to the shoe production quality over time. Often, companies will switch up the production and this can definitely make a difference.
 
This post should help you find a running shoe that’s right for you! Need help identifying your foot type and what type of shoe would be best for you? Let’s chat!

The Pain Threshold: When Do I Slow Down, Stop, or Keep Going?

By: Dr. Stephanie Duffey • Dec 04, 2019


As a physical therapist, I’m often asked the question, “How do I know when I need to slow down, stop, or keep going?” It’s a valid question, and one that many people struggle to identify. It’s challenging to interpret what you’re feeling in your body, when you can push harder, and when you need to scale back. So, to keep things simple, I came up with a little something I like to call the stoplight method. Let’s break it down.

Green Light: When you’re operating at the green light level, you’re able to exercise with no aches and pains and you may even be looking for ways to intensify your workouts. If you’re a runner, you’d be able to maintain the current pace or distance that you’re following with no discomfort. This is where you want to be (but I know this isn’t always possible or realistic).

What to do: Maintain what you’re doing, or experiment with advancing to the next level. For runners, this means working toward a faster pace or increasing your mileage.

Yellow Light: Signs to look for if you’re approaching the yellow light include light soreness or achiness that persists for more than 24 hours after your run, a small limp when running (but not when walking), and slight swelling of your joints after a run.

What to do: Slow down a bit—this is your body telling you to back-off. Take a rest day and re-evaluate how you’re feeling. Try to recognize patterns. For example, maybe your knees start to hurt when it’s time to get new running shoes, so take a trip to the shoe store! Listen to your body and take action if there’s a behavior you need to change to feel better and enhance your performance.

Red Light: If you’re approaching the red light, you’re experiencing very sharp pain that stops you in your tracks. The pain is debilitating and you are unable to walk without a limp. You may be experiencing intense swelling in your joints and intense discomfort that doesn’t subside after 24 hours.

What to do: It’s time to consult an expert. You may be at risk of a stress fracture or other serious injury. While it’s challenging to seek help and cease physical activity, it’s important to be seen by an expert early, so your injury doesn’t intensify. You may also be able to recover more quickly if you get help for the problem earlier rather than later.

I hope my simple stoplight method helps you identify how to deal with the pain you may be experiencing in your body and the action steps you need to take to feel better.

Need help from an expert? Let’s chat!

PRACTICE, PRACTICE, PRACTICE *

Paul Linden, PhD

Aikido of Columbus

www.being-in-movement.com

I have been practicing Aikido since 1969 and Parkinson’s Disease since 2004. Aikido is a non-violent Japanese martial art and a study of peacemaking. Parkinson’s is a degenerative disease of the brain. The two have a lot in common.

Many years ago, while visiting Los Angeles, I met a friend of a friend. As we were sitting together eating lunch, he casually said, “You know, I could kill you as you sit there.” I smiled and said, “Yes, of course you could” and kept eating. I knew he wasn’t being hostile but was merely expressing a fact. Astonished that I understood, he explained that he was a Viet Nam veteran, and that was his way of testing me.

He had killed many people, and he knew how thin the line is between life and death. He knew that anyone could die at any moment. Combat soldiers learned to live on the edge of life and death, and when they came home, they were unable to fit back into normal society, which pretends that death won’t happen. He was stunned that a non-veteran knew that edge. I told him about my martial arts training and how it was possible to know the edge without killing anyone.

Two concepts underlie Aikido as I practice and teach it: First, emotions and attitudes are physiological events in the body, and to receive an attacker in a peaceful way, the body must be trained to do so. And second, the body moves with better balance and strength in a state of inner stillness, kindness, and gratitude. (My website has a free downloadable handout titled EMBODIED PEACEMAKING which details the basic exercises that I use to teach this.)


• Copyright Columbus Dispatch 2013. The newspaper published this essay, and they were generous enough to allow me to use it in my teaching.


Practicing calmness when attacked and compassion for the attacker caries over to stresses and problems that aren’t attacks. Such as Parkinson’s, for instance. When I was diagnosed, my initial reaction was shock! And my practice for the next six months was to say to myself many times a day “Parkinson’s” and train my body to go into calmness instead of fear. Gradually stillness and compassion took the unease out of the disease.

The real function of martial arts, I think, is to help us accept our fundamental weakness. I can block a punch, I can parry a kick, and I can escape an arm lock. But I can’t control the weather, a presidential election, or whether I have Parkinson’s. Once we build up enough personal power, we can accept somewhat calmly the unacceptable.

Having Parkinson’s is inconvenient, but if I get frustrated or irritated at it, the tremors increase and the disease feels worse. The more I meet Parkinson’s with an attitude of compassionate engagement and relaxed strength, the better my body functions. This is not philosophy. It’s physiology.

The questions are: What do I choose to become as Parkinson’s eats away at my brain? Do I cultivate habits of fear or anger about my condition or habits of power and compassion? So in the end, practicing Parkinson’s is very similar to practicing Aikido.

Parkinson’s will never be popular as a path of self-improvement. The same approach, though, can be applied to everyday difficulties — whether personal, interpersonal or international. The world would be very different if people didn’t respond to difficulties in a rush of fear and anger. Think of all the killing and aggression that would not take place if we each took responsibility for our body and our hurtful reflexes. Peace would be possible.

—————————–

PAUL LINDEN, Ph.D. is a specialist in body awareness education, and his work focuses on the interplay between self-exploration and more efficient and effective action. He has extensive experience teaching people such as musicians, athletes, pregnant women, children with attention disorders, and computer users. Two of his focus areas are abuse recovery and peacemaking.

He is the developer of Being In Movement® mindbody education, and founder of the Columbus Center for Movement Studies. He holds a Ph.D. in Physical Education, a sixth degree black belt in Aikido and a first degree black belt in Karate, and he is an instructor of the Feldenkrais Method® of somatic education.

He is the author of a number of e-books, and videos, among which are:

• Winning is Healing: Body Awareness and Empowerment for Abuse Survivors

• Embodied Peacemaking: Body Awareness, Self-Regulation and Conflict Resolution

• Feeling Aikido: Body Awareness Training as a Foundation for Aikido Practice

• Comfort at Your Computer: Body Awareness Training for Pain-Free Computer Use (a paper book)

* Embodying Power And Love: Body Awareness & Self-Regulation 10 hour video.

Why I Use a Gratitude Journal

By: Dr. Stephanie Duffey • Aug 03, 2020

A sprig of green beside a gold pen and pink gratitude journal that says, "TODAY I AM GRATEFUL."
Now it’s more important than ever to develop positive habits to get you through trying situations (umm… can you say global pandemic!?) That’s why I’m sharing how I practice gratitude daily. I began journaling about three years ago and have shifted to gratitude-focused journaling this past year. And let me tell you…it’s been LIFE-CHANGING! It’s completely altered my perspective and how I approach times of stress. Here are the four reasons why you should start using a gratitude journal:
1. When you focus on positivity this leaves no room for negativity in your brain. Seriously, I can attest to this! When you take the time to focus on the things going well in your life, you naturally become more positive. By writing down what you’re thankful for, it can make you even more optimistic because you are choosing to see more of the positivity in your life, while giving less power to negative emotions. You may have positive aspects of your life floating around in your subconscious, but writing them down makes them more real.
2. It causes you to look for things to be grateful for throughout the day. It’s easy to get wrapped up in the day-to-day hustle and bustle. Chances are, you’re in such a hurry that you’re losing sight of how much you enjoy your morning cup of coffee, or the beautiful weather outside, or lunch with a friend. When you’re searching for reasons to be grateful, you’re going to be more aware and you’ll manifest gratitude. Say for example, you’ve been thinking of buying a new car. All of a sudden, you start to notice that car all over the road. In reality, it’s been there all along but because you’re paying attention and seeking it out, you see it all around you.
3. It can keep stressful situations in perspective. I’m not suggesting that you can’t ever acknowledge stress. You should definitely take the time to process tough situations, but by focusing on the good, you’re more likely to see the positives. For example, the current pandemic has no doubt wreaked havoc. People have lost jobs, vacations and weddings have been canceled, and many of our favorite places have shut down until further notice. The silver lining though is that families have had more time than ever before to slow down and connect. Or maybe your work-from-home hours have given you the flexibility to start a new hobby or make more time for yourself. It’s all about perspective.
4. It helps form positive habits. When you’re consistently focused on gratitude, this is the default for your brain. The things you do frequently become a habit so you’ll start to form a positive mindset that’s engrained in how you approach a situation. I like to call it building an attitude of gratitude! Practice makes perfect but the more you seek out gratitude, the more natural it becomes.
I hope this encourages you to start your own practice of gratitude journaling. Here’s one of my favorite journals to get you started. Happy journaling!

Plantar Fasciitis: What the Heel?

By: Dr. Stephanie Duffey • Mar 02, 2020


​If you’re dealing with plantar fasciitis, you know how stubborn and tricky this ailment can be! In this post, I’ll break down the root causes and share my tips for managing the discomfort and eliminating the problem for good.

WHAT IS PLANTAR FASCIITIS?

You have a thick band of tissue called the plantar fascia, which stretches from the bottom part of the heel to the toes. This tissue is designed to give your foot extra stability, but sometimes it can get irritated. You may notice sharp and intense heel pain in one or both of your feet when you get up in the morning, or when you stand up and walk after sitting for a while. These are common signs that you may be experiencing plantar fasciitis.

WHAT’S THE CAUSE?

​The pain you’re experiencing is the result of irritation in the plantar fascia. But what’s causing this irritation? Likely, you have other areas in your body that are too tight, too loose, or too weak. This could be another area in the foot, leg, or even the core. Finding out why you’re experiencing this discomfort is the most challenging part and allows me as a physical therapist to play detective. It’s always my goal to get at the root cause of the issue to keep people out of pain long-term.

WHAT CAN YOU DO?

Other than identifying what caused the irritation in the first place, here are some of my other tips for managing plantar fasciitis:

  • Get a frozen plastic water bottle, freeze it, and roll your foot on it using moderate pressure a few times a day. This loosens the tissue and the ice cuts inflammation. You can also use a tennis or lacrosse ball.
  • Stretch your calves with the knee straight and then bent, or use a foam roller. Tightness and trigger points in the calf can be a contributing factor and refer pain to the heel so it’s extra important to stretch this area.
  • Stretch the plantar fascia by crossing the ankle over your knee and pulling your toes backward. This is a great way to loosen up the bottom of your foot
  • Get a supportivepronation-control shoe. Plantar fasciitis pain can come from excessive or quick pronation. Find a shoe that works for you and use inserts as a secondary supplement.
  • Try a night splint or sock that pulls the toes up to give a long duration stretch while you sleep. This can be uncomfortable so I recommend you build your way up. Start with a few hours and gradually work up to the whole night. It usually takes about 3 months to get the full benefit.
If you’re suffering from plantar fasciitis, my biggest piece of advice is to do something ASAP. The longer it’s irritated, the longer it takes to treat and calm down. Need help from an expert? Let’s chat!

8 Steps to Relieve and Prevent Back Pain

By: Dr. Stephanie Duffey • Mar 02, 2020
Experts estimate that up to 80% of the population will experience back pain at some time in their lives. While common among many people, back pain is NOT the norm and there are many steps you can take to relieve and prevent it from occurring. Today, I’ll break down 8 steps that I’ve implemented into my own life to help reduce back pain.
 
  1. Watch how you lift. Whether you’re lifting a squirming child or weights, be sure to lift with your legs, not your back. The quads and glutes are waaayyy stronger than your small back muscles, so be mindful.
  2. Take a posture check. How you sit (or stand) during the day is really important. Desk jobs in particular bring you forward and cause you to slump. Think of it this way: For every degree your head comes forward, your spine muscles have to work exponentially harder. Not sure what your posture looks like? Have a co-worker take a surprise picture of you sitting at your desk to get a good glimpse of your posture during the day.
  3. Use a lumbar roll, especially if you work at a desk or drive frequently. A lumbar roll is a squishy pillow that you can place behind your low back to create additional support. It also helps your posture when you’re seated. Here’s the one I use from Amazon.
  4.  Take a stress test. What repetitive motions do you do frequently exhibit throughout the day that cause aggravation? Maybe it’s reaching for something, picking up an infant, or some other movement. Make a tally of what’s causing irritation in your back on a daily basis.
  5. Strengthen your core correctly. By activating ALL the core muscles (not just the six-pack in the front) you take strain off your back. While strengthening your core isn’t the only way to resolve back pain, it certainly is a game-changer.
  6. Move your body. Incorporating movement into your daily routine can significantly reduce back pain. The next time you miss your workout, notice how you feel. Chances are, you’ll feel much better when the muscles are loose from working out.
  7. Stretch your hips, mid and upper back. Practice mobility work so you can move through these areas and you aren’t relying only on the mobility of your back alone.
  8. Use good pillow support when you’re sleeping. If you’re a belly-sleeper, you may try placing a pillow under your hips. You should also consider training yourself not to be a stomach-sleeper to take some of the pressure off of your back. If you’re a side-sleeper, put a pillow between your knees to keep your legs stacked. This helps take the twist out of the low back). Back sleepers should try placing a pillow under the knees for additional support.
 
It’s never too early to start taking preventative measures to protect your back and it’s never too late to start living a pain free life! If you’re experiencing back pain and need help from a professional, let’s chat!